The other day, Vic and I were watching The Travel Channel. We stumbled across a show all about State Fair Foods and got sucked in by all the artery clogging fried food goodness. You would think this would be something safe to sit in front of and brainlessly veg. You'd be wrong.
Instead of sitting there and being brainless, I started getting inspiration for better versions of the foods and desserts they were talking about...less frying, more goodness. I think I was having delusions of being a food blogger or something. My brain was thinking of things like pumpkin mousse ice cream, homemade ginger snaps, and other goodness. I got ideas for original recipes and they are plaguing my brain and begging to be made.
I'm trying to convince myself that these food projects can wait until after BlogHer (O.M.G. I'm leaving for BlogHer in only 16 days). I really need to convince myself that these new food projects need to wait because I have a ton of other things I HAVE to complete before BlogHer. I've got crochet projects that must be completed. I have to perfect and make at least one Gay Pride Oreo. I've decided that this dream MUST become real. I also have to make a birthday cake with Vanilla Bean frosting that I'm bringing to BlogHer for a very special friend. Birthday party in my room on Wednesday, August 1st. Somewhere in there I also have to take care of my kids, pack my bags for BlogHer, and start on a few household projects that MUST be done this summer.
Yeah, I really do have to wait for my side trip into food blogging that was inspired by (but will be so much better than) Fair Food. I'm going to be lucky to hold onto my sanity with everything else I have going on.
What do you have planned for the next couple of weeks? Share please.
Showing posts with label kitchen madness. Show all posts
Sunday, July 15, 2012
Saturday, July 07, 2012
Home of the Knob Conqueror and more
- Joey's home and he had a great time. They climbed Raven's Knob and all the first year scouts got their picture taken on the top.
- Joey's camera was acting up a bit so I'll have to get a picture from someone else.
- Gabe is so thrilled to have Joey home and this means he's being wild and crazy.
- Unfortunately since Joey's been away, Gabe's nonsense which would have driven him crazy, he now thinks is hilarious. This just encourages Gabe.
- Joey just got home and, in only 10 days, Marty leaves for a week...going to NOLA for the national Lutheran Youth Gathering.
- Gabe fell asleep leaning against Jennifer at just past 7. It was so cute.
- Did you know that today's stardate is 11207.07?
- I think I forgot to tell y'all that I won tickets to the BlogWorld New Media Expo in Las Vegas in January. I didn't think I would be able to go. I was resigned to selling my ticket. But, super secret negotiations are going on and I'll probably be able to go. And, I'll be staying at the Rio...
- I've discovered one thing that really ticks me off about my Nook. When someone (me) is stoopid and lets the battery die, those almost 300 books that are loaded on the SD card instead of the physical memory of the Nook disappear off the shelves. They are still on the card but all the categorization, all the time spent shelving them, is fucking GONE! ARRRRRGGGGGHHHHHHH
- It's almost midnight and still about 85 degrees. If I get my shit together, I'm going to bake cookies in my van tomorrow.This damned heat has got to be good for something.
- We had milkshakes for dessert tonight (thanks for the idea Joey). Here's the recipe...
Mint Chocolate Chip Milkshakes with Oreos
3 large scoops of mint chocolate chip ice cream
3 oreos
1/2 cup of milk
1. crush the oreos in blender/food processor
2. add ice cream and milk to the cookies
3. mix and enjoy
PS...this was all done with my hand powered
food processor since my blender died
3 large scoops of mint chocolate chip ice cream
3 oreos
1/2 cup of milk
1. crush the oreos in blender/food processor
2. add ice cream and milk to the cookies
3. mix and enjoy
PS...this was all done with my hand powered
food processor since my blender died
Tuesday, April 24, 2012
Tasty Tuesday: Western Frittata
I love frittatas. There's a rustic charm about them. They are super easy to make and they are just as delicious as omelets without any of the fussiness.
Now, when I make frittatas, I usually end up making at least two...one with fewer ingredients for Gabe and Joey and one with all the good stuff for Vic, Marty, and me. I prep everything I can together, split it for the two frittatas, and then add the good stuff to one. This makes enough that I have leftovers even though I'm feeding 3 growing boys and 2 adults.
Western Frittata
plus a Sausage and Cheese Frittata
Ingredients
- one large onion, diced
- 6 cloves of garlic, minced
- 1 lb sausage links, browned and sliced
- one large bell pepper, seeded and diced
- a large handful of grape tomatoes, quartered
- one 8oz can of sliced mushrooms
- 4 cups shredded cheddar cheese
- 8 sticks of string cheese, cut into slices
- 1 doz eggs
- 2 cast iron (or oven safe) frying pans, 1 8in and 1 10in
- saute onions and garlic in butter over medium heat until onions are translucent
- split onions and garlic between 2 bowls
- brown and slice sausage; put half in each bowl
- saute bell peppers, tomatoes, and mushrooms until you get a little browning; add all of it to one bowl
- split the shredded cheddar and add to both bowls
- slice the string cheese into 1/4in pieces and divide between bowls
- break 5 eggs into bowl with just sausage and cheese; break 7 eggs into the other bowl
- mix thoroughly
- pour the sausage cheese mixture into a lightly greased 8in cast iron frying pan
- pour the western frittata mixture into lightly greased 10in cast iron
- preheat oven to 375
- while oven preheats, start cooking the frittatas on the stove (cook over medium heat until the outer edges start to set)
- transfer frittatas to oven...if your cast iron frying panhas a wooden handle, make sure you remove it...please don't ask me how I know that needs to be done
- cook frittatas until eggs are completely done and the top of frittatas are slightly brown
Do you have a favorite egg based recipe?
Thursday, April 12, 2012
Kitchen Gadget Madness
I am in kitchen gadget heaven. I spent part of the day with my mother-in-law and, while I was there, she decided it was time to get rid of some of the kitchen stuff my *brother-in-law had bought. I came home with all kinds of goodies. I had an entire bag full of yummy drink mixes, a bag with soup mixes, and some kitchen gadgets (pictures are clickable links to products).
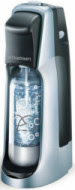
Every time we went over to visit Jose, my kids would go gaga over his soda maker. Yup, my brother-in-law had his own soda maker. You start with plain tap water, use a CO2 cartridge to add the carbonation, and then add your flavor of choice. My mother-in-law remembered how much my boys liked it and sent it home with me so the boys could have something to remember Uncle Jose with. We made root beer tonight and it was delish. Joey said it was better than the store bought root beer and Gabe just laughed hysterically at the farting noise it makes while it carbonates the water.
I also came home with my very own whipped cream maker/dispenser. You know those aerosol cams of whipped cream you can buy at the grocery store? Well, this handy little gadget lets you have that at home without all the chemicals and crap they put into the commercial version. Sure, it's really easy to make whipped cream with a blender but this gadget is pretty damned cool too. I don't think I ever would have bought it for myself but I definitely like having it.
The last kitchen gadget I have to share with you is something I actually bought for myself last month. I was looking to replace my Swizz Prozzz food chopper that I bought last year. I loved that thing and used it almost every day but, sadly, it broke (not a fault of the product...my dishwasher overheated and warped it). When I was searching, I found the Chef'n VeggiChop Hand Powered Food Chopper. It was significantly cheaper than the Swizz Prozzz and it had two features I really loved. The little arm that is designed to keep herbs and small pieces of veggies off the bottom so they will continue to get chopped is permanently affixed. My Swizz Prozzz had one of those arms but it was removable and it always fell off and finally broke. The Chef'n VeggiChop also has a much larger capacity than my Swizz Prozz. I got the Chef'n VeggiChop and I love it. I use these hand choppers so much more than a full sized food processor. They are so east to clean and don't take up nearly as much counter space or cabinet space.
What's your favorite kitchen toy and where can I get it?
PS...this post is sponsored by no one. I'm just telling you about products I like.
Wednesday, April 11, 2012
Extra, Extra: Sweet and Spicy Barbecue Sauce
Tonight, when I was cooking dinner, I discovered I was missing something vital from my pantry...barbeque sauce. So, I decided to whip some up. Marty and I both loved it. Gabe and Joey thought it was too spicy. I guess I'll have to make two batches next time.
Sweet and Spicy Barbecue Sauce
3/4 cup of ketchup
1 8oz can of tomato paste
1 cup of water
1/3 cup of vinegar
1/2 cup brown sugar
2 Tbsp of Goya Adobo
1 Tbsp black pepper
1 tsp cayenne pepper
Combine all ingredients and mix thoroughly (I used my small food processor).
Apply half of sauce to ribs 20 minutes before they are done. Return to oven.
Add remainder of sauce to ribs 5 minutes before they are finished cooking.
Enjoy
*Adobo can be found in most grocery stores on the Hispanic food aisle.
**Spiciness can be reduced by simply reducing or eliminating the cayenne pepper.
Sweet and Spicy Barbecue Sauce
3/4 cup of ketchup
1 8oz can of tomato paste
1 cup of water
1/3 cup of vinegar
1/2 cup brown sugar
2 Tbsp of Goya Adobo
1 Tbsp black pepper
1 tsp cayenne pepper
Combine all ingredients and mix thoroughly (I used my small food processor).
Apply half of sauce to ribs 20 minutes before they are done. Return to oven.
Add remainder of sauce to ribs 5 minutes before they are finished cooking.
Enjoy
*Adobo can be found in most grocery stores on the Hispanic food aisle.
**Spiciness can be reduced by simply reducing or eliminating the cayenne pepper.
Tuesday, April 10, 2012
I Scream, You Scream, We All Scream For Ice Cream
Y'all, there is a very, very sad thing going on in my kitchen. I have a gorgeous, beautiful ice cream maker. I've had it for over a year. It still hasn't been used. This is sad. No, it's beyond sad. It is tragic. I really think I need to fix this sometime soon. Now, I just need to figure out what recipe to make.
One of my favorite ice creams in the whole world was made by Godiva back before they broke my heart and stopped making ice cream. This decadent, divine indulgence was known as Godiva Chocolate Raspberry Truffle ice cream. I've missed it enough that I'm toying with trying
to recreate it. All it would take is a kick ass chocolate ice cream recipe, some truffles chopped up to mix in, and some raspberries and raspberry syrup. Seriously, what is better than raspberry and chocolate?
My other option for breaking in my ice cream maker is a recipe developed by the lovely Susan over at She's Becoming Doughmesstic, Caramelized Peach and Ginger Cream Cheese Caramel Swirl Ice Cream. Susan first
introduced this recipe back in July of '09 and just recently posted it again to celebrate the release of the frozen dessert cookbook. There are two big benefits I can see to this option...1) I'd have a recipe to follow and 2) if I'm really lucky, the name will scare my kids off and that means more for me.
Which flavor would you pick for me to make first or do you have another suggestion entirely?
One of my favorite ice creams in the whole world was made by Godiva back before they broke my heart and stopped making ice cream. This decadent, divine indulgence was known as Godiva Chocolate Raspberry Truffle ice cream. I've missed it enough that I'm toying with trying
to recreate it. All it would take is a kick ass chocolate ice cream recipe, some truffles chopped up to mix in, and some raspberries and raspberry syrup. Seriously, what is better than raspberry and chocolate?
My other option for breaking in my ice cream maker is a recipe developed by the lovely Susan over at She's Becoming Doughmesstic, Caramelized Peach and Ginger Cream Cheese Caramel Swirl Ice Cream. Susan first
introduced this recipe back in July of '09 and just recently posted it again to celebrate the release of the frozen dessert cookbook. There are two big benefits I can see to this option...1) I'd have a recipe to follow and 2) if I'm really lucky, the name will scare my kids off and that means more for me.
Which flavor would you pick for me to make first or do you have another suggestion entirely?
Tuesday, April 03, 2012
C is for Cookie
Now what starts with the letter "C"?
"Cookie" starts with "C"!
Let's think of other things that starts with "C"!
Uh. . .Uh. . . Who cares about da other things?!
"C" is for Cookie that's good enough for me,
"C" is for cookie that's good enough for me,
Oh! cookie, cookie, cookie starts with "C"!
"C" is for Cookie that's good enough for me,
"C" is for cookie that's good enough for me,
Oh! cookie, cookie, cookie starts with "C"!
Hey, You know what? A round cookie with one bite out of it looks like a "C"
A round donut with one bite out of it also looks like a "C" but it is not as good as a cookie
Oh, and the moon sometimes looks like a "C" but you can't eat that
So...
"C" is for cookie that's good enough for me,
Oh! cookie, cookie, cookie starts with "C"!
Cookie Cookie Cookie Starts with "C"
This is one of my all time favorite chocolate chip cookie recipe. What's your favorite kind of cookie and do you have a recipe to share?
"Cookie" starts with "C"!
Let's think of other things that starts with "C"!
Uh. . .Uh. . . Who cares about da other things?!
"C" is for Cookie that's good enough for me,
"C" is for cookie that's good enough for me,
Oh! cookie, cookie, cookie starts with "C"!
| Chocolate Chip Crunch Cookies |
"C" is for cookie that's good enough for me,
Oh! cookie, cookie, cookie starts with "C"!
Chocolate Chip Crunch Cookies - by Joanne Fluke
found in her book Chocolate Chip Cookie Murder
1 cup butter (2 sticks melted)
1 cup white sugar
1 cup brown sugar
2 tsp baking soda
1 tsp salt
2 tsp vanilla
2 beaten eggs (beat with fork)
2 1/2 cups flour (not sifted)
2 cups crushed corn flakes(crush them with your hands)
1 - 2 cups chocolate chips
Hey, You know what? A round cookie with one bite out of it looks like a "C"
A round donut with one bite out of it also looks like a "C" but it is not as good as a cookie
Oh, and the moon sometimes looks like a "C" but you can't eat that
So...
Preheat oven 375 degrees. Rack in the middle position."C" is for Cookie that's good enough for me,
Melt butter, add the sugars and stir. Add soda, salt, vanilla, and beaten eggs. Mix well. Then add flour and stir it in. Add crushed corn flakes and chocolate chips and mix it all thoroughly.
Form dough into walnut-sized balls with your fingers and place on a greased cookie sheet, 12 to a standard sheet. Press down slightly with a floured or greased spatula.
Bake at 375 degrees for 8 to 10 minutes. Cool on a cookie sheet for 2 minutes, then remove to a wire rack until they’re completely cool. (The rack is important – it makes them crisp.)
Yield: 6 to 8 dozen, depending on cookies size.
Hannah’s Note: If these cookies spread out too much in the oven, reduce temperature to 350 degrees and do not flatten before baking.
"C" is for cookie that's good enough for me,
Oh! cookie, cookie, cookie starts with "C"!
Cookie Cookie Cookie Starts with "C"
This is one of my all time favorite chocolate chip cookie recipe. What's your favorite kind of cookie and do you have a recipe to share?
Friday, March 16, 2012
Random Shit from My Cootie Addled Brain
- I feel like I need to apologize. When I wrote my post for the healing salon, I inadvertently left out an entire segment of the ALI community - those who are living child free after infertility. I certainly didn't mean to leave anyone out and I'm truly sorry if it made anyone feel bad.
- Someone forgot to tell the powers that be that my family's turn for illness and physical bullshit was over. Seriously, I am so done with it. Gabe is still congested. I feel like crap (thanks for sharing your cold Gabe). Marty's head still isn't better. And, I'm at my wits end.
- Gabe is totally cracking me up lately. He has taken to telling me I am his dear heart. I have this crazy urge to giggle every time he says that.
- This week, I've been researching OCR software (optical character recognition) and hand held scanners for a project I'm working on. OCR software lets you take a scan of a document and turn it into an editable PDF. Does it make me a total geek that I know and care about these things?
- Our phone is messing up and it's pissing me off. We have a VOIP line and, for some God unknown reason, people have been getting a rapid busy signal type tone when they call in. We've rebooted the VOIP modem once but it started doing it again today. Thanks to that damned modem, I missed a call back from the neurologist.
- As much as I love technology, it's also been pissing me off. I was loading books onto my Nook this week and, with 2 books left, it tells me device is full. My first response was "Bullshit. I know I don't have enough books on there to match the capacity I see talked about." Well, I found out that on a 2 Gig Nook Simple Touch, about 1 Gig is taken up by the operating system. I can hang with that. But, what ticked me off was that out of the remaining Gig of space, 3/4 of it is reserved for books or content loaded directly from Barnes and Noble and only 1/4 is available for books from other sources. The reason it pissed me off is that they don't tell you this up front. So, yeah, my Nook space really was full. Had to go order a micro SD card to take care of that issue.
- I need to make 4 dozen plus cookies tomorrow...4 dozen for a church thing and the plus part remains here at home. Whose going to come help me?
Tuesday, February 07, 2012
Tasty Tuesday: Cheesy Cream Sauce (or soup)
Y'all, after making this, I don't think I will ever buy cream of anything soup again. I seriously had to restrain myself from eating it before we used it for dinner tonight. I was making enough for a family of 5 which includes 3 boys with voracious appetites. You can easily cut this recipe in half.
Be warned...this is not a healthy recipe. This is a once in a while, treat yourself recipe. It would probably make Paula Deen proud.
Cheesy Cream Sauce (or soup)
Ingredients:
1 cup butter
6 cloves of garlic, minced
1 medium onion, minced
12 tbsp flour
5 cups of milk
1 container of Knorr Homestyle Chicken Stock (4 in each package)
a large handful of shredded Colby Jack cheese (about a cup)
salt and pepper to taste
1 cup butter
6 cloves of garlic, minced
1 medium onion, minced
12 tbsp flour
5 cups of milk
1 container of Knorr Homestyle Chicken Stock (4 in each package)
a large handful of shredded Colby Jack cheese (about a cup)
salt and pepper to taste
- Melt the butter in a saucepan over medium low heat.
- Add minced garlic and minced onions to butter and saute until onions and garlic soften.
- Add flour to melted butter and make a roux.
- Add milk and Knorr Homestyle Chicken stock. Stir gently until roux dissolves. Cook over low heat, stirring occasionally until it starts to thicken.
- Dump in cheese. Stir until cheese melts completely.
- Salt and pepper to taste.
This soup/cream sauce tastes divine. It would be fabulous over broccoli or cauliflower. It would be divine with chunks of potato and crumbled bacon. It is awesome.
*This post wasn't sponsored by anyone. I did get the Knorr Homestyle stock at BlogHer '11 and love it.
Sunday, February 05, 2012
Migraines suck balls (the Super Bowl Edition)...
but they certainly make me productive.
I know that seems counter-intuitive but it's true. When I have a migraine, I simply can not sit down in front of a computer. The screen refresh rate is killer when I have a migraine. Sadly, I can't even take meds and then sit down in front of it because that damned screen refresh rate kicks it back into high gear. So, this has been the first time in the past 16 hours or so that it's been safe for me to go online.
Since my dear friend, *Vitamin V, kept the bitch of a migraine in check, I felt good enough to get things done. So,today during the day on Saturday, I folded two loads of laundry, dried one load of laundry, and washed one load. I put away all of Gabriel's clothes that had been folded over the past few days and made sure my little ragamuffin took a bath last night. On a side note, Gabe washes his own hair now. I just have to supervise to make sure he actually washes and doesn't just play in the bath. I made 6 dozen+ Oreo Truffles in chocolate, cherry, and mint flavors. I cooked Chicken Ranch Quesadillas with chicken for dinner (made 17 so there would be leftovers). I also helped Marty make a spicy cheese ball to have with crackers while we watch the Super Bowl on Sunday. And, I did all the dishes from Friday night (was a slacker on Friday) and all the dishes that were dirtied through baking and cooking and eating. Oh yeah, sometime in between it all, I also deep conditioned my hair.
If I could guarantee this level of productivity, it would almost make having migraines tolerable.
What have you been up to this weekend? Have you made anything special to munch on during the Super Bowl? Are you cheering on one of the teams or are you just watching the game for the commercials?
*Vitamin V = vicodin
I know that seems counter-intuitive but it's true. When I have a migraine, I simply can not sit down in front of a computer. The screen refresh rate is killer when I have a migraine. Sadly, I can't even take meds and then sit down in front of it because that damned screen refresh rate kicks it back into high gear. So, this has been the first time in the past 16 hours or so that it's been safe for me to go online.
Since my dear friend, *Vitamin V, kept the bitch of a migraine in check, I felt good enough to get things done. So,
If I could guarantee this level of productivity, it would almost make having migraines tolerable.
What have you been up to this weekend? Have you made anything special to munch on during the Super Bowl? Are you cheering on one of the teams or are you just watching the game for the commercials?
*Vitamin V = vicodin
Tuesday, January 24, 2012
Tasty Tuesday: Lemon Chocolate Chip Pound Cake
Since migraines and computers don't mix for me, I couldn't play with my computer yesterday afternoon. I decided to play in the kitchen instead. Luckily, my mom brought me a new cookbook Saturday and I found some inspiration there. The rest of my inspiration came from a Lemon Blueberry Yogurt Loaf I pinned a short time ago.
Gabe and I played around in the kitchen and created a new family masterpiece. We ended up making a Lemon Chocolate Chip Pound Cake with Lemon Glaze.
Once you've pulled the cake out of the oven, you can make the glaze while it's cooling.
To make the glaze...
Gabe and I played around in the kitchen and created a new family masterpiece. We ended up making a Lemon Chocolate Chip Pound Cake with Lemon Glaze.
Lemon Chocolate Chip Pound Cake with Lemon Glaze
Cake Ingredients
5 eggs
3 cups flour
3 cups sugar
1/2 cup milk
1/2 cup lemon juice
1/2 cup of butter
1 cup butter flavored shortening
1/2 tsp baking soda
1/4 tsp salt
Glaze Ingredients
1/4 cup of butter
2 cups of powdered sugar
4 tablespoons lemon juice
To make the cake...
- Cream together butter, shortening, and sugar.
- Once fully blended, continue mixing while adding eggs one at a time.
- Continue mixing while adding flour a little at a time.
- Add milk, lemon juice, baking soda, and salt. Mix at medium speed for at least 3 minutes once all ingredients have been added.
- Pour into greased and floured Bundt pan and bake for 1 1/2 hours at 275°.
Once you've pulled the cake out of the oven, you can make the glaze while it's cooling.
To make the glaze...
- Melt the butter in a saucepan.
- Reduce heat to low and stir in the sugar.
- Keep stirring until mixture is smooth.
- Add in lemon juice and stir until fully blended.
- Remove from heat and drizzle over cake.
Enjoy!
Tuesday, December 06, 2011
Tasty Tuesday: Happy Happy Birthday!
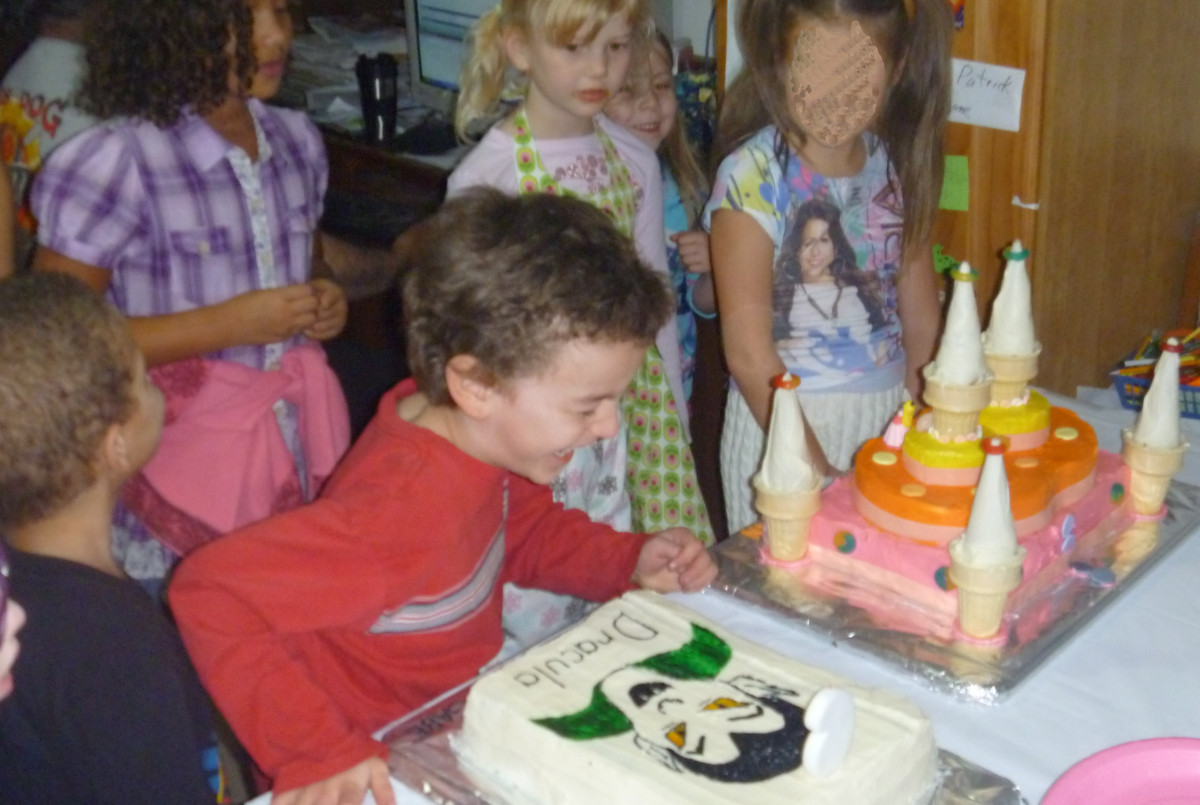
To celebrate my birthday, I decided that I'd share the birthday cakes I made for T and Gabe's party this past weekend. Gabe specifically requested a Draclea (Dracula in Gabe speak) cake and T asked fora Princess's castle cake.
Both these cakes were made with the chocolate cake recipe from last Tuesday. They were absolutely delicious. If you try out the recipe, let me know what you think?
Tuesday, November 29, 2011
Tasty Tuesday: World's Best Chocolate Cake
Hey y'all...I have to share this recipe with you. I found a recipe a while back and tweaked it here and there to come up with this...
World's Best Chocolate Cake
3 cups packed brown sugar
1 cup butter or margarine, softened
4 eggs
2 teaspoons vanilla extract
2 2/3 cups all-purpose flour
1 1/4 cup baking cocoa
1 1/2 tablespoon baking soda
1/2 teaspoon salt
1 tbsp cinnamon
1/2 tsp nutmeg
1 1/3 cups heavy whipping cream
1 1/3 cupsboiling super hot water
Honestly, the original recipe looked like it would be super finicky. It had you mixing things one at a time and using different bowls. It was a pain in the ass. Just for giggles, I decided to try the dump it all in a bowl and mix it method. Guess what? It worked. The cake was so moist and delicious. It turned out perfectly. Bake in two greased and floured 9 in pans at 350 degrees for 35 to 40 minutes.
Sorry I don't have any pictures. I'll be using this recipe for Gabe and T's cakes for this weekend and I'll be sure to get pictures then.
World's Best Chocolate Cake
3 cups packed brown sugar
1 cup butter or margarine, softened
4 eggs
2 teaspoons vanilla extract
2 2/3 cups all-purpose flour
1 1/4 cup baking cocoa
1 1/2 tablespoon baking soda
1/2 teaspoon salt
1 tbsp cinnamon
1/2 tsp nutmeg
1 1/3 cups heavy whipping cream
1 1/3 cups
Honestly, the original recipe looked like it would be super finicky. It had you mixing things one at a time and using different bowls. It was a pain in the ass. Just for giggles, I decided to try the dump it all in a bowl and mix it method. Guess what? It worked. The cake was so moist and delicious. It turned out perfectly. Bake in two greased and floured 9 in pans at 350 degrees for 35 to 40 minutes.
Sorry I don't have any pictures. I'll be using this recipe for Gabe and T's cakes for this weekend and I'll be sure to get pictures then.
Thursday, July 28, 2011
TastyTuesday on Thursday: Cookies (temp added)
...more specifically (until I come up with a better name) Coconut Cheesecake Chocolate Chip Cookies. I was playing in the kitchen last weekend and honestly meant to post this on Tuesday but life got in the way. I think this recipe may need a little tweaking but it's pretty damned delicious as it is.
Coconut Cheesecake Chocolate Chip Cookies
Ingredients
1 1/4 cup unsalted butter
1/2 cup sugar
1 cup brown sugar
2 eggs
1 tsp baking soda
1 tsp salt
1 1/2 tsp vanilla
1 box of cheesecake pudding
3 cups flour
2 cups coconut
1 bag (12 oz) of chocolate chips
Preheat oven to 350 degrees. Cream together butter, sugars, eggs, and vanilla. Set aside. In separate bowl, mix soda, salt, pudding mix, and flour. Slowly add dry mixture to wet mixture, mixing thoroughly as you go. Fold in coconut and chocolate chips. Drop by rounded teaspoonfuls onto ungreased cookie sheets. Bake for about 10 to 12 minutes or until lightly golden brown. Can yield up to 5 dozen cookies (it all depends on how much dough you eat while making them).
These are really a delicious variation of our old favorite, the chocolate chip cookie. They really deserve a better name than they have. Anyone have a suggestion for me?
Coconut Cheesecake Chocolate Chip Cookies
Ingredients
1 1/4 cup unsalted butter
1/2 cup sugar
1 cup brown sugar
2 eggs
1 tsp baking soda
1 tsp salt
1 1/2 tsp vanilla
1 box of cheesecake pudding
3 cups flour
2 cups coconut
1 bag (12 oz) of chocolate chips
Preheat oven to 350 degrees. Cream together butter, sugars, eggs, and vanilla. Set aside. In separate bowl, mix soda, salt, pudding mix, and flour. Slowly add dry mixture to wet mixture, mixing thoroughly as you go. Fold in coconut and chocolate chips. Drop by rounded teaspoonfuls onto ungreased cookie sheets. Bake for about 10 to 12 minutes or until lightly golden brown. Can yield up to 5 dozen cookies (it all depends on how much dough you eat while making them).
These are really a delicious variation of our old favorite, the chocolate chip cookie. They really deserve a better name than they have. Anyone have a suggestion for me?
Tuesday, July 12, 2011
Tasty Tuesday: Roasted Fresh Veggies
Welcome to both Day 10 of Calliope's blogging summer camp and the latest edition of Tasty Tuesday.
One of the things I LOVE about summer time is the wonderful selection of fresh veggies available. And, one of my favorite ways to prepare them is also one of the easiest.
Roasted Fresh Veggies
Ingredients
This can be made with any type of fresh veggies...sweet potatoes and potatoes are also good options.
3 zucchini
3 yellow squash
2 large onions
1 cup baby carrots
4 cloves of garlic
olive oil
soy sauce
a little salt
1)Preheat oven to 350 degrees
2) Cut veggies into large chunks. I quartered the squash and zucchini lengthwise. Then, I cut them into chunks about 1 inch thick.
3) Put all the veggies into large baking dish
4) Mince the garlic and mix it with the veggies
5) Drizzle the veggies with olive oil and soy sauce
6) Mix it up thoroughly and lightly salt
7) Roast veggies for about 35 - 40 minutes
I love to eat these veggies either on their own or over rice.
One of the things I LOVE about summer time is the wonderful selection of fresh veggies available. And, one of my favorite ways to prepare them is also one of the easiest.
Roasted Fresh Veggies
Ingredients
This can be made with any type of fresh veggies...sweet potatoes and potatoes are also good options.
3 zucchini
3 yellow squash
2 large onions
1 cup baby carrots
4 cloves of garlic
olive oil
soy sauce
a little salt
1)Preheat oven to 350 degrees
2) Cut veggies into large chunks. I quartered the squash and zucchini lengthwise. Then, I cut them into chunks about 1 inch thick.
3) Put all the veggies into large baking dish
4) Mince the garlic and mix it with the veggies
5) Drizzle the veggies with olive oil and soy sauce
6) Mix it up thoroughly and lightly salt
7) Roast veggies for about 35 - 40 minutes
I love to eat these veggies either on their own or over rice.
Tuesday, June 14, 2011
Tasty Tuesday: Strawberry Crumb Cake
Hey y'all...feeding three semi-human male children with black holes where their stomachs should be hungry boys means cooking a lot and, since grocery prices have gone up so much, I'm making more and more from scratch. Not too long ago I saw some scrumptious looking Blueberry Crumb Cake over on Shelly's blog, Momfiles.com. Luckily, she had a link to the Blueberry Crumb Cake recipe (from The Pioneer Woman) which meant I could get baking when the urge hit. As I am wont to do, I tweaked the recipe a bit. The recipe on The Pioneer Woman says it is suitable for 9 x 13 pan but the picture with the recipe looked a little thin so I doubled the recipe and it made a 9 x 13 cake that was a decent thickness and 9 in. loaf pan too.
Strawberry Crumb Cake
Ingredients
1 stick butter
2 Tbsp (additional) butter
1½ cups sugar
2 whole egg
1 tsp vanilla extract
4 cups all-purpose flour
4½ tsps baking powder
2 tsp cinnamon I added this
½ tsp nutmeg I added this
1 tsp salt
1½ cupswhole 2% milk
4 cups fresh strawberries cut into small chunks
_____
FOR THE TOPPING:
1½ sticks butter
1 cups sugar
1 teaspoon cinnamon
1 cups flour
½ teaspoon salt
1) Preheat oven to 350 degrees.
2) Combine flour, baking powder, and a salt. Stir and set aside.
3) Cream 1 stick plus 2 tablespoon butter with cinnamon, nutmeg, and sugar. Add eggs and mix until combined. Add vanilla and mix. Add flour mixture and milk alternately until totally incorporated. Do not overbeat. Stir in strawberries until evenly distributed.
4) Grease a 9 x 13 inch baking pan and a 9 inch loaf pan. Pour in batter.
5) In a separate bowl, combine topping ingredients and cut together using two knives or a pastry cutter. Sprinkle over the top of the cake.
6) Bake cake for 45 to 50 minutes, or until golden brown.Sprinkle with sugar. Cut into squares and serve with softened butter. it doesn't need the extra fat or calories...it's amazing as is.
*Notes...Use fresh fruit in this. Frozen fruit will still add an amazing flavor but will not stand up well to baking. All strike outs are things I omitted or changed. All other changes or additions are noted in the recipe.
Strawberry Crumb Cake
Ingredients
1 stick butter
2 Tbsp (additional) butter
1½ cups sugar
2 whole egg
1 tsp vanilla extract
4 cups all-purpose flour
4½ tsps baking powder
2 tsp cinnamon I added this
½ tsp nutmeg I added this
1 tsp salt
1½ cups
4 cups fresh strawberries cut into small chunks
_____
FOR THE TOPPING:
1½ sticks butter
1 cups sugar
1 teaspoon cinnamon
1 cups flour
½ teaspoon salt
1) Preheat oven to 350 degrees.
2) Combine flour, baking powder, and a salt. Stir and set aside.
3) Cream 1 stick plus 2 tablespoon butter with cinnamon, nutmeg, and sugar. Add eggs and mix until combined. Add vanilla and mix. Add flour mixture and milk alternately until totally incorporated. Do not overbeat. Stir in strawberries until evenly distributed.
4) Grease a 9 x 13 inch baking pan and a 9 inch loaf pan. Pour in batter.
5) In a separate bowl, combine topping ingredients and cut together using two knives or a pastry cutter. Sprinkle over the top of the cake.
6) Bake cake for 45 to 50 minutes, or until golden brown.
*Notes...Use fresh fruit in this. Frozen fruit will still add an amazing flavor but will not stand up well to baking. All strike outs are things I omitted or changed. All other changes or additions are noted in the recipe.
Tuesday, May 03, 2011
Tasty Tuesday: help me name it
Hey y'all. I was up to my usual experimentation in the kitchen and I came up with a pretty tasty dish. There's just one problem. It doesn't have a name. It needs a name.Help me name it please.
Ingredients:
2 lbs ground beef
1 large Vidalia (or any sweet) onion
2 cups (unchopped) baby carrots
4 cups broccoli
6 stalks of celery
3 cloves of garlic
1 tbsp oregano
1 tbsp parsley
1 1/2 tsp basil
salt to taste
2 1/2 cups water
1 cup good red wine*
For thickening: 2 cups cold water with 1/2 cup flour dissolved in it
Directions:
Ingredients:
2 lbs ground beef
1 large Vidalia (or any sweet) onion
2 cups (unchopped) baby carrots
4 cups broccoli
6 stalks of celery
3 cloves of garlic
1 tbsp oregano
1 tbsp parsley
1 1/2 tsp basil
salt to taste
2 1/2 cups water
1 cup good red wine*
For thickening: 2 cups cold water with 1/2 cup flour dissolved in it
Directions:
- Brown ground beef over medium heat
- While ground beef is browning, dice onions, celery, carrots, and garlic
- Drain ground beef and return to heat. Add onions, celery, carrots, and garlic. Stir thoroughly.
- Add oregano, parsley, and basil and cook until the onions begin to become translucent.
- Add the red wine (I used a Cupcake Vineyards Malbec) and water
- Let is simmer for 15 minutes
- Add half the thickening agent. Simmer an additional 10 minutes.
- If you want your broth/sauce/whatever thicker, add the rest of the thickening agent.
- Add broccoli and cook until broccoli is tender crisp
- Salt to taste and serve over rice.
Saturday, April 23, 2011
T is for Treats
Tomorrow is Easter and each of the boys will be getting an Easter basket filled with treats. Every year, the Easter Bunny stocks their baskets with eggs filled with jelly beans, a chocolate bunny, and a variety of chocolates. This year, the Easter Buy enlisted my help and asked if I would be willing to make some of the chocolates for their baskets. Now, I'm not brave enough (and I don't have a bunny mold) to make the chocolate bunnies but I did decide to tackled chocolate covered peanut butter eggs and I pulled out the old favorite of Oreo based truffles. And, let me tell you, the Oreo truffles can not be any easier.
Oreo Truffles

Ingredients
1 16oz package of Oreos
1 8oz package of cream cheese
1 16 oz package or chocolate chips
Directions
1. Crush Oreos into fine crumbs. If you have a food processor, the cookies can be put in there intact and they will be able to be crushed. If you plan on placing the cookies into a plastic ziploc bag and crush them using a rolling pin, first open the cookies and scrape the cream filling into a bowl. Save the cream filling.
2. Thoroughly blend softened cream cheese with crushed Oreos (and the Oreo cream).
3. Roll the resulting mixture into small, bite sized balls.
4. Place truffle filling balls onto a wax-paper covered cookie sheet and thoroughly chill (you can place them in the freezer if you have space).
5. Dip truffle balls into melted chocolate and return to wax-paper covered baking sheets. Allow chocolate coating to harden (if it is humid, you may need to put them in the fridge to aid the hardening of the chocolate shell).
To melt the chocolate chips
1. Put chocolate chips into microwave safe bowl.
2. Microwave for 30 secs at a time, stirring after each 30 sec heating, until you get to desired consistency.
3. Can be repeated as needed throughout truffle making.
Chocolate Peanut Butter Eggs(sorry no picture)
Ingredients
2 cups peanut butter
1 8oz package of cream cheese
2 tsp vanilla
2 16oz packages of chocolate chips
Directions
1. Mix first 3 ingredients until creamy.
2. Form into egg shapes and place on a wax-paper covered cookie sheet and thoroughly chill (you can place them in the freezer if you have space).
3. Dip into melted chocolate (see directions above for process to melt chocolate)
4. Return to wax-paper covered baking sheets. Allow chocolate coating to harden (if it is humid, you may need to put them in the fridge to aid the hardening of the chocolate shell).
Oreo Truffles

Ingredients
1 16oz package of Oreos
1 8oz package of cream cheese
1 16 oz package or chocolate chips
Directions
1. Crush Oreos into fine crumbs. If you have a food processor, the cookies can be put in there intact and they will be able to be crushed. If you plan on placing the cookies into a plastic ziploc bag and crush them using a rolling pin, first open the cookies and scrape the cream filling into a bowl. Save the cream filling.
2. Thoroughly blend softened cream cheese with crushed Oreos (and the Oreo cream).
3. Roll the resulting mixture into small, bite sized balls.
4. Place truffle filling balls onto a wax-paper covered cookie sheet and thoroughly chill (you can place them in the freezer if you have space).
5. Dip truffle balls into melted chocolate and return to wax-paper covered baking sheets. Allow chocolate coating to harden (if it is humid, you may need to put them in the fridge to aid the hardening of the chocolate shell).
To melt the chocolate chips
1. Put chocolate chips into microwave safe bowl.
2. Microwave for 30 secs at a time, stirring after each 30 sec heating, until you get to desired consistency.
3. Can be repeated as needed throughout truffle making.
Chocolate Peanut Butter Eggs(sorry no picture)
Ingredients
2 cups peanut butter
1 8oz package of cream cheese
2 tsp vanilla
2 16oz packages of chocolate chips
Directions
1. Mix first 3 ingredients until creamy.
2. Form into egg shapes and place on a wax-paper covered cookie sheet and thoroughly chill (you can place them in the freezer if you have space).
3. Dip into melted chocolate (see directions above for process to melt chocolate)
4. Return to wax-paper covered baking sheets. Allow chocolate coating to harden (if it is humid, you may need to put them in the fridge to aid the hardening of the chocolate shell).
Tuesday, February 22, 2011
Tasty Tuesday: Chocolate Raspberry Mousse Cake plus a surprise
Kira from Grafting a Branch onto the Family Tree asked for the recipe for my Chocolate Raspberry Collapse which started out as Chocolate Raspberry Mousse Cake. It's been a while since I've done a tasty Tuesday post so I guess it's time. The inspiration for this cake came from Susan of She's Becoming DoughMessTic's Best Birthday Cake Ever. As delicious as her cake sounded, I thought it could be made even better by substituting raspberries for strawberries and oranges.


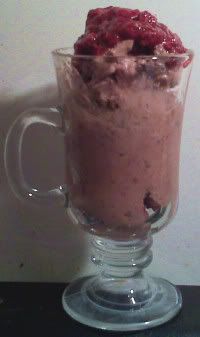
When you make the mousse for the cake/collapse above, double the recipe. The leftovers make a wonderful dessert for the next day. Also, when you put the raspberry mixture through the strainer, there will be a thick raspberry substance that won't go through the strainer. It is almost the consistency of a jelly before it sets. Save this and it makes the perfect topping for the mousse.
Enjoy it y'all.
Chocolate Raspberry Mousse Cake

Devils Food Cake Layer
1 Box Devils Food Cake
3 eggs
1/2 cup Canola Oil
1/4 tsp Raspberry Extract
1/4 tsp Vanilla Extract
1 cup water
splash of milk
1/2 box (small size) Instant Cheesecake Pudding
3 Tbsps. Chocolate Syrup
Combine all ingredients in stand mixer and beat for 2-3 minutes. Pour into 10 inch springform pan that has been greased and lined with parchment circle. Spread evenly and rap on counter to remove air bubbles. Bake 35-38 minutes, or until toothpick test indicates done. Allow to cool before proceeding.
Chocolate Raspberry Mousse Filling
complied from http://www.cookfromthehip.com/2009/06/raspberry-mousse-chocolate-cake.html and from http://www.doughmesstic.net/2009/08/26/best-birthday-cakeever/
10 oz bag frozen raspberries
1 cup sugar
1 envelope unflavored gelatin
1 ½ cup heavy cream
10 oz bag frozen raspberries
1 cup sugar
1 envelope unflavored gelatin
1 ½ cup heavy cream
4 Tbsps. Sugar
8 oz. Melted Semisweet Chocolate
Heat the raspberries and sugar in a small saucepan. Stir until all of the raspberries break down and are heated through. Run the raspberries through a strainer and into a new saucepan. Add the gelatin to the raspberries and heat until the gelatin is dissolved. Remove from the heat and set aside.
Beat whipping cream until just stiff. Add sugar, beat again until well combined. Add in melted chocolate (I heated mine in the microwave at 30 second intervals until melted then allowed it to cool a bit before adding it to the whipping cream). Mix thoroughly. Fold the cooled raspberries into the whipped cream. Cover and allow to chill in refrigerator.
Divide the filling evenly between the four cakes to make a double layer cake.
Assembly
Heat the raspberries and sugar in a small saucepan. Stir until all of the raspberries break down and are heated through. Run the raspberries through a strainer and into a new saucepan. Add the gelatin to the raspberries and heat until the gelatin is dissolved. Remove from the heat and set aside.
Beat whipping cream until just stiff. Add sugar, beat again until well combined. Add in melted chocolate (I heated mine in the microwave at 30 second intervals until melted then allowed it to cool a bit before adding it to the whipping cream). Mix thoroughly. Fold the cooled raspberries into the whipped cream. Cover and allow to chill in refrigerator.
Divide the filling evenly between the four cakes to make a double layer cake.
Assembly
Baked Cake, cut in half horizontally to form 2 layers
1/4 cup Raspberry Jam
8 oz. raspberries
Chocolate Raspberry Mousse
3 Tbsps. Chocolate Syrup
Sweetened Whipped Cream in Piping Bag (Use your favorite recipe)
Place one layer of cake on cake board, cut side up. Top with chocolate syrup. Spread strawberry jam over the syrup. (If jam doesn’t spread easily, heat it for 10 seconds in the microwave.) Place sliced strawberries over the jam, covering entire layer.Top with a little over half of the prepared mousse.
Place second cake layer over mousse, finished side up. Ice with remaining mousse, going just to the edges. (I left my sides uncovered so that the layers could be seen.) Pipe sweetened whip cream over top. You can cover the entire top if you wish, but I chose to only do a thick border and a center circle which I garnished with a berry. Chocolate curls or shavings would have been really nice on this as well.
Sweetened Whipped Cream
Ingredients:
1 cup heavy cream
2 tablespoons powdered sugar
1 teaspoon vanilla
Preparation:
Chill large bowl, beaters and cream before whipping. Whip cream until almost stiff. Add sugar and vanilla; beat until cream holds peaks. Do not overbeat. Refrigerate until ready to serve.
******************************
All you have to do to change it from the lovely cake you see above (I used standard round cake pans and did not cut each layer in half) to the delish Chocolate Raspberry Collapse is cut each layer in half without the proper tools...making sure they are too thin in parts. Then, when you follow the assembly instructions, the cake layers break and spread. At this point, you scoop it all into a serving bowl and pretend that's what you were aiming for from the start.******************************
The Surprise Extra...Chocolate Raspberry Mousse
Enjoy it y'all.
Monday, February 21, 2011
Cooking Maestro?!?!?!?
Yesterday was Marty's 14th birthday (please, please, pretty please go wish him a happy birthday) and I spent a good portion of the day cooking. At one point, I had my handheld beater in one hand making the whipped cream/mousse filling for the cake and, with the other hand, I was pulling the cheddar garlic rolls out of the oven. I think that qualifies as multi-tasking. The dinner alone qualifies me as a cooking maestro. I mean look at this meal...
The only thing better than looking at it was eating it. The rib eyes practically melted in your mouth. The sauteed onions and mushrooms were divine (Gabe and Joey will always disagree on that). The green beans were crisp and flavorful. and the mashed potatoes were loaded. It was a meal fit for a king or a bottomless pit of a 14 yr old.
Then, I think I got my maestro status at least temporarily suspended if not revoked. Last year, I made Marty an amazing Chocolate Raspberry Mousse Cake.

Not only did the cake look good but it tasted so damned good that Marty wanted it again this year. I made one fatal error this year though. I decided to follow the instructions that have you slice each layer of the cake in half so there are more places to put the yummy mousse and raspberry filling. See, last year I decided I didn't want to deal with the crumbs that always come when you slice a cake and I just made three round layers for the cake. It went together perfectly.It stood up perfectly. It was awesome. This year...not so much. I guess when I sliced each layer into two layers, my cuts must not have been straight enough. It made the whole cake horribly unstable. I bet you bakers in the crowd can guess what happened. The construction of the cake started out ok...
but with each added layer, the layers below started to give out and collapse. By the time I was done adding layers, the cake had spread out a whole lot. In fact, I think one of the layers had completely split down the middle. Cutting it just made it worse. In fact, cutting destabilized it so much that I gave up and scooped the rest of it into a bowl. It was not a pretty sight people.
If it wasn't for the divine flavor of this cake (?!?), I'd have to say dessert was a complete fail. As it is, everyone thought it tasted good enough to devour, despite it's homely appearance. In fact, we decided to claim we created a new dessert. Marty wants to call it Birthday Pudding. My sister by choice Jennifer voted for Chocolate Raspberry collapse. I went for Chocolate Raspberry Birthday Cake Pudding. Which name do you think fits it the best?
BTW, welcome to all you wonderful ICLW people. I have some links that give you a good overview of my life and my story up above.
The only thing better than looking at it was eating it. The rib eyes practically melted in your mouth. The sauteed onions and mushrooms were divine (Gabe and Joey will always disagree on that). The green beans were crisp and flavorful. and the mashed potatoes were loaded. It was a meal fit for a king or a bottomless pit of a 14 yr old.
Then, I think I got my maestro status at least temporarily suspended if not revoked. Last year, I made Marty an amazing Chocolate Raspberry Mousse Cake.

but with each added layer, the layers below started to give out and collapse. By the time I was done adding layers, the cake had spread out a whole lot. In fact, I think one of the layers had completely split down the middle. Cutting it just made it worse. In fact, cutting destabilized it so much that I gave up and scooped the rest of it into a bowl. It was not a pretty sight people.
If it wasn't for the divine flavor of this cake (?!?), I'd have to say dessert was a complete fail. As it is, everyone thought it tasted good enough to devour, despite it's homely appearance. In fact, we decided to claim we created a new dessert. Marty wants to call it Birthday Pudding. My sister by choice Jennifer voted for Chocolate Raspberry collapse. I went for Chocolate Raspberry Birthday Cake Pudding. Which name do you think fits it the best?
BTW, welcome to all you wonderful ICLW people. I have some links that give you a good overview of my life and my story up above.
Subscribe to:
Posts (Atom)